Note: This post contains affiliate links. If you decide to purchase through these links, we may receive a small percentage of the sale or commission at no additional cost to you. You can read more about our affiliate partnerships on our policy page.


How to convert a Honda Element into a Car camper
UPDATED AUGUST 11, 2021
Travel. It’s one of those magical words we all love.
Before we were even inspired to create this travel blog, we spent our days dreaming up where we could go next. Since moving to Denver in 2017, we hit the road often, exploring as much of Colorado and the surrounding states as we could. Soon our road trips started becoming more and more ambitious, including a long-haul trip from Colorado to the Oregon Coast and several others to New Mexico and Utah.
But in order to travel and explore as much as we do, we needed to find ways to cut costs and reduce our expenses. While we love to stay in unique vacation rentals, sometimes our budget just doesn’t allow us to do that every night. Camping is an excellent option to help keep costs down, especially when you’re traveling through multiple states. With that said, sometimes you don’t want the hassle of packing and unpacking gear. And then there’s the added factor of weather. Keeping all this in mind, we decided to purchase a 2006 Honda Element and attempt our first camper conversion project!
We are certainly not the first to do this, and we found much of our inspiration from visiting sites like Pinterest and browsing various YouTube videos. Some of them really go all out and include things like solar panel installations and sinks with running water. Because we wanted the option to still use the Element as a four-seat vehicle, we decided to attempt something a little more convertible and slightly more modest.
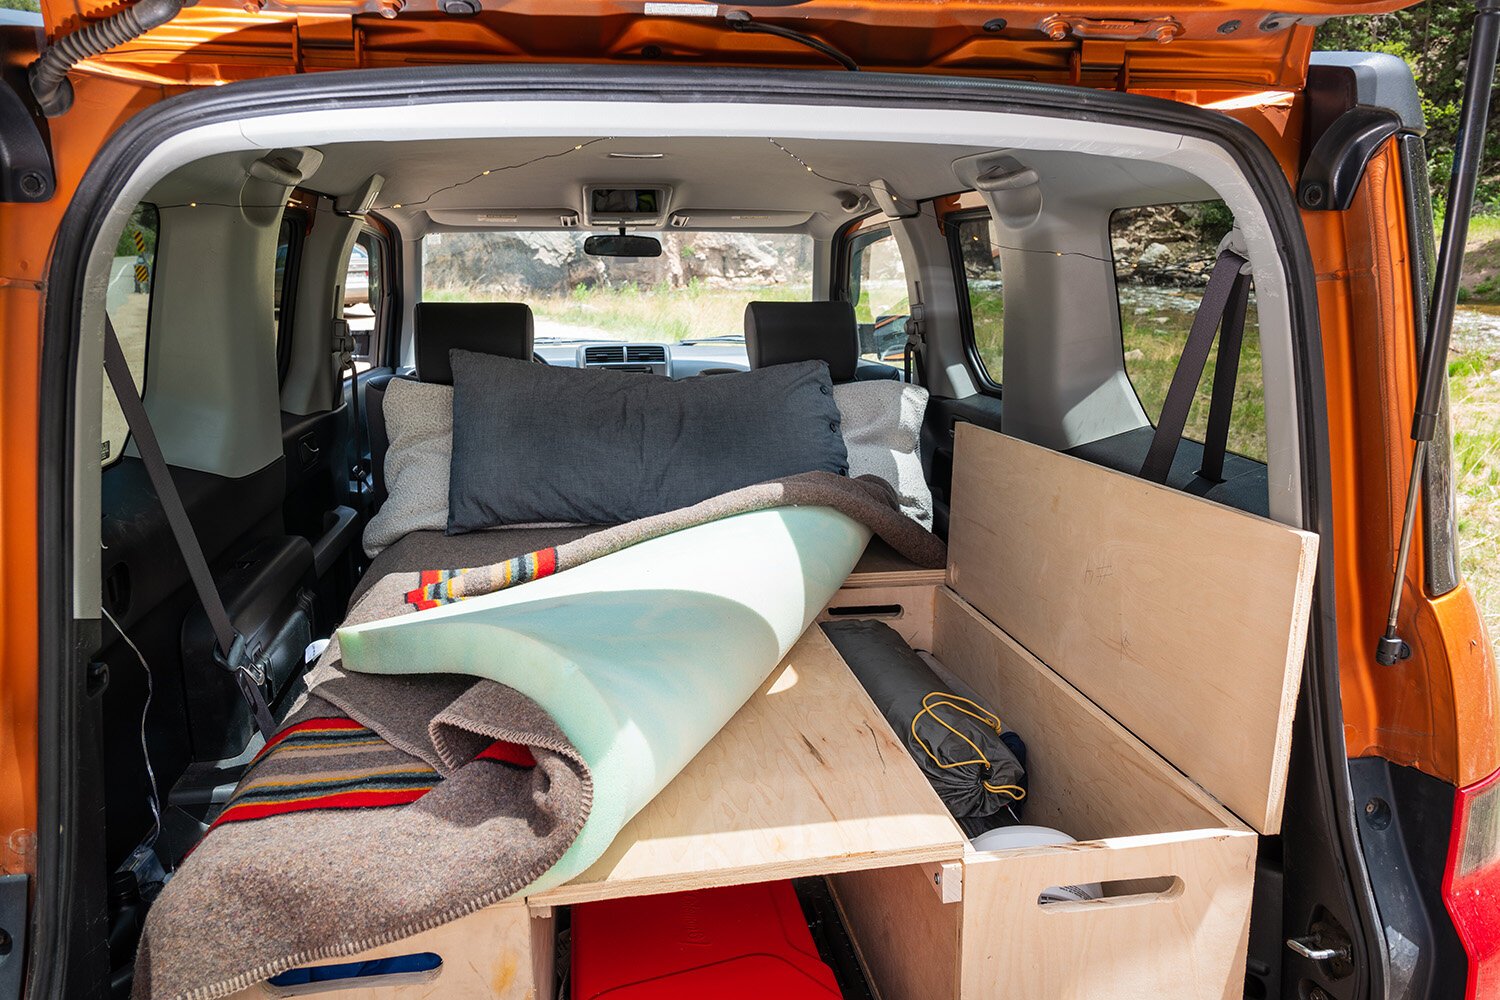
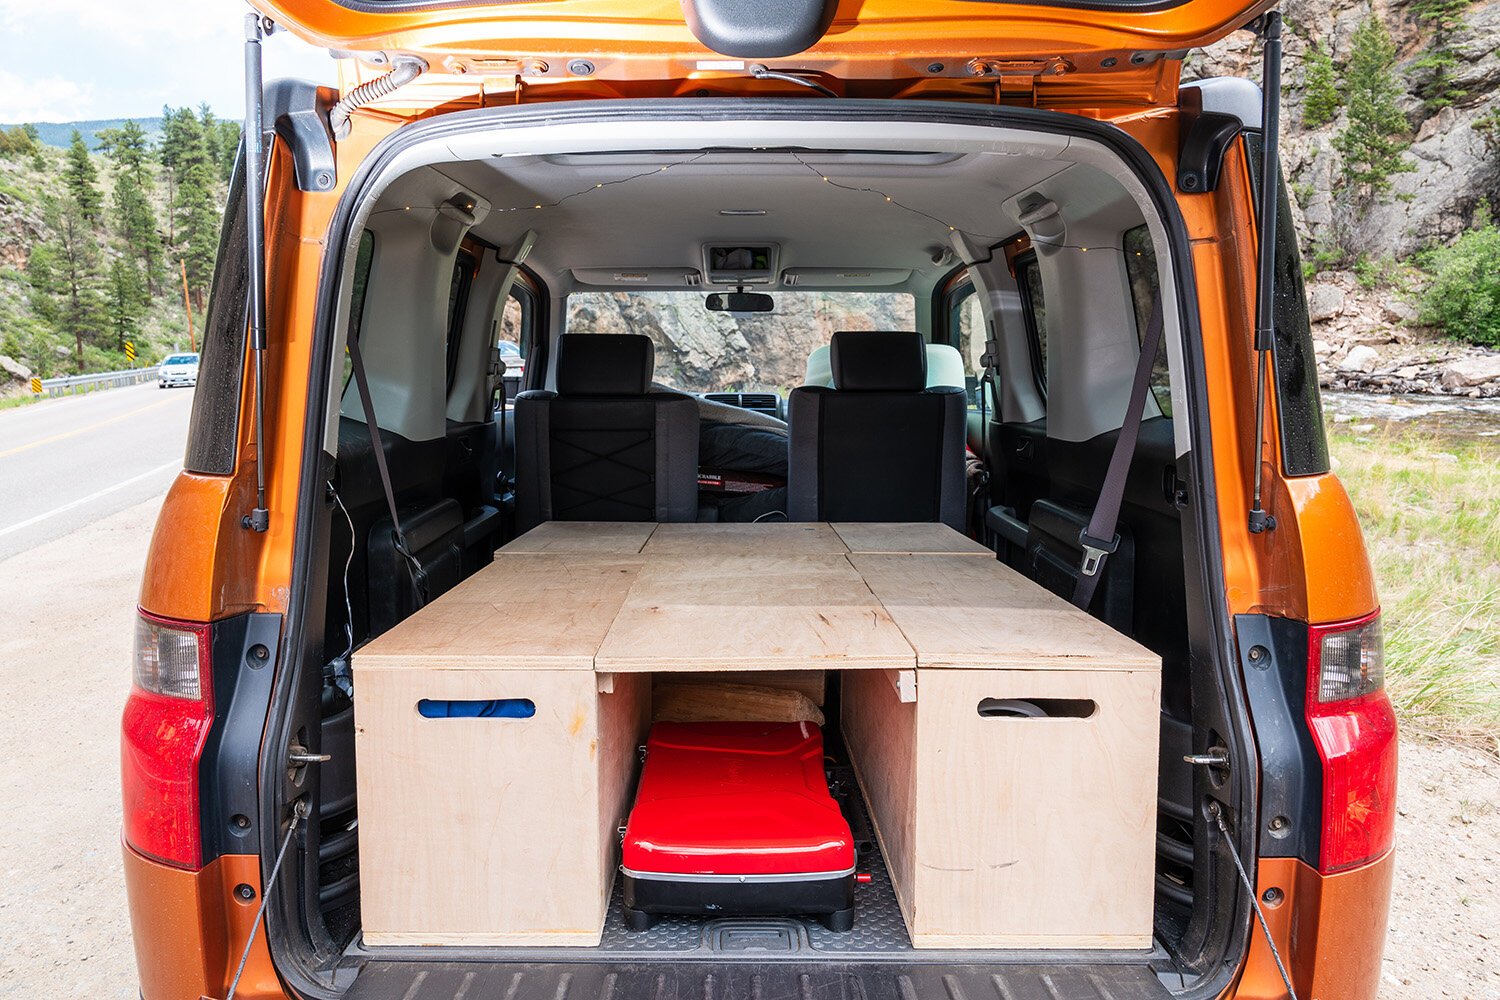
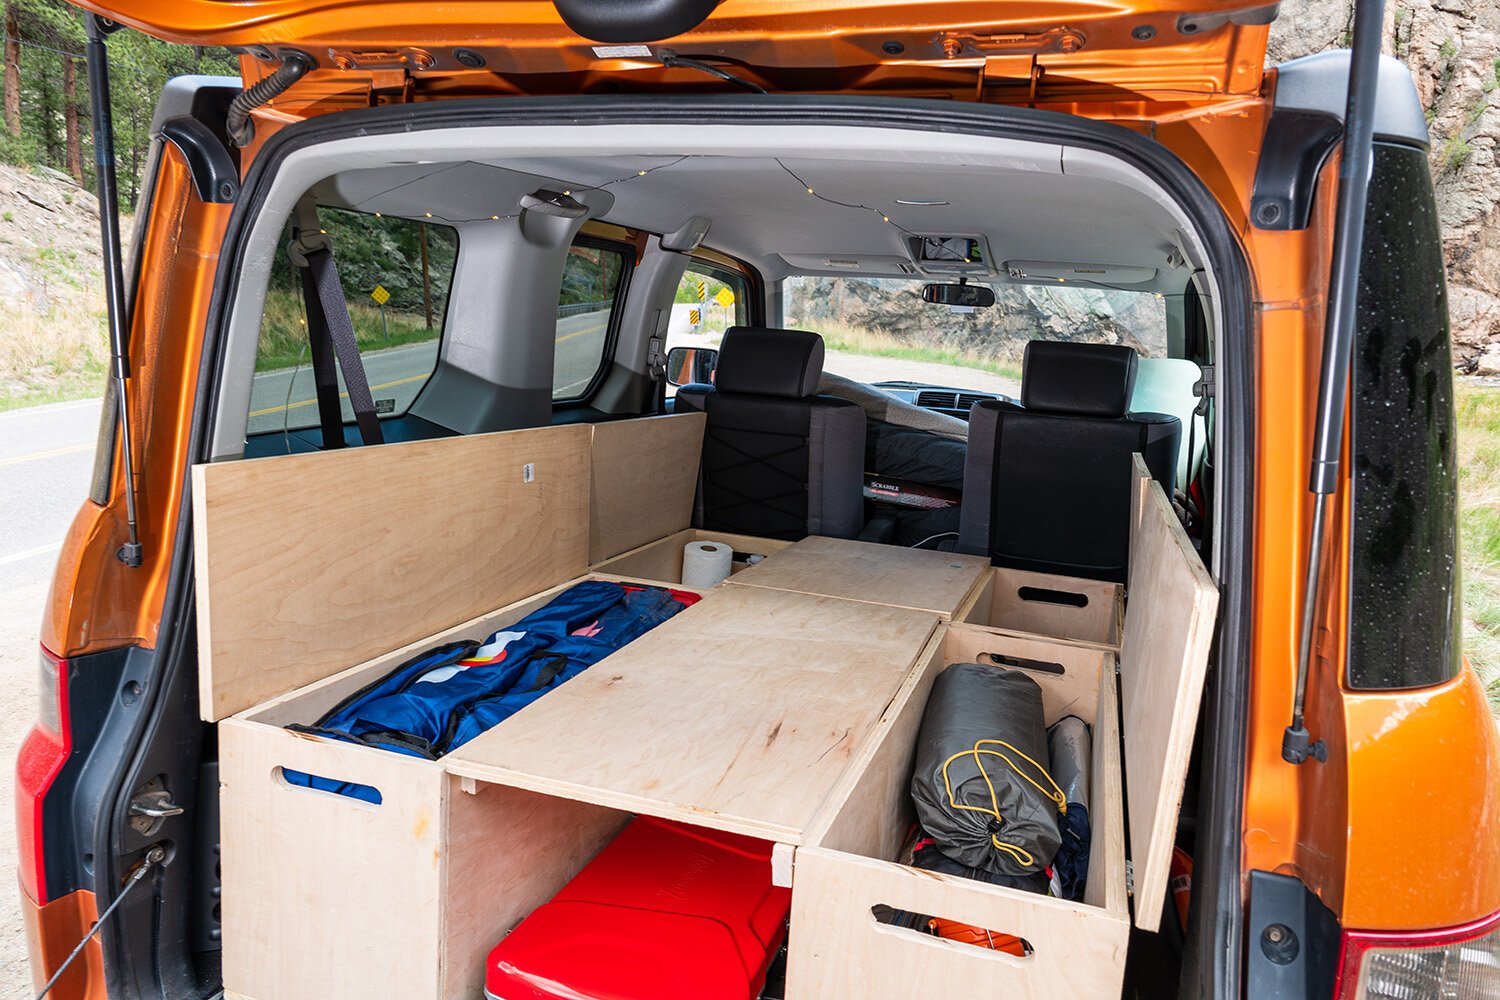
As you’ll see in the photos and description below, we chose to construct a set of custom wooden boxes that could be used as storage and also function as a platform bed.
By the way, you don’t need to be a licensed contractor to pull this off. Hardly! My only woodworking experience prior to this was 8th-grade “Shop” class back in ’91. In other words, YOU CAN DO THIS!

Honda Element Camper bed ideas
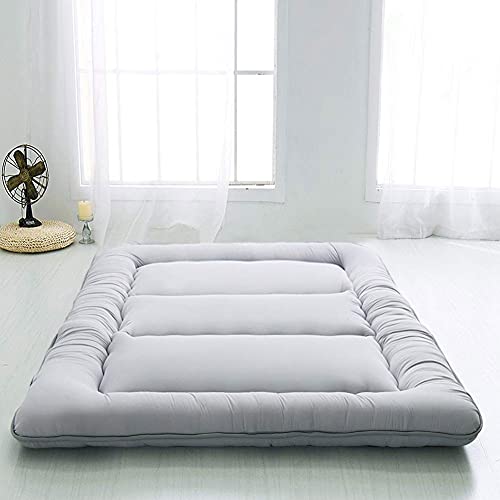
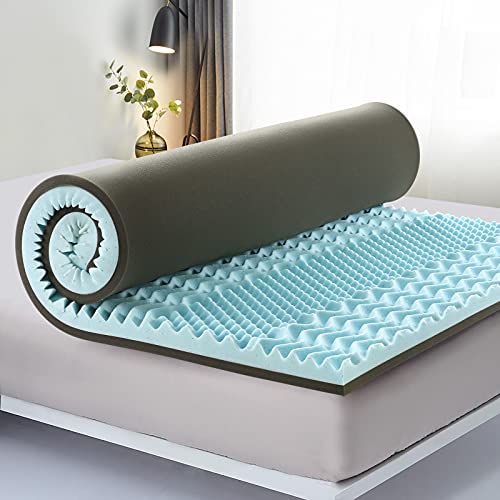
You can use a foam mattress topper for the sleeping pad or self-inflating sleeping pads. We started off with the foam topper, then purchased a slim futon, which is way more comfortable. For ultimate cushiness (and a better night’s sleep), I recommend using a futon and foam topper together.

One of the best things about this Honda Element Camper design is that all the boxes are easily removed, allowing you to turn your camper back into a regular car anytime you want. The boxes can even fit inside your back trunk. Bonus!
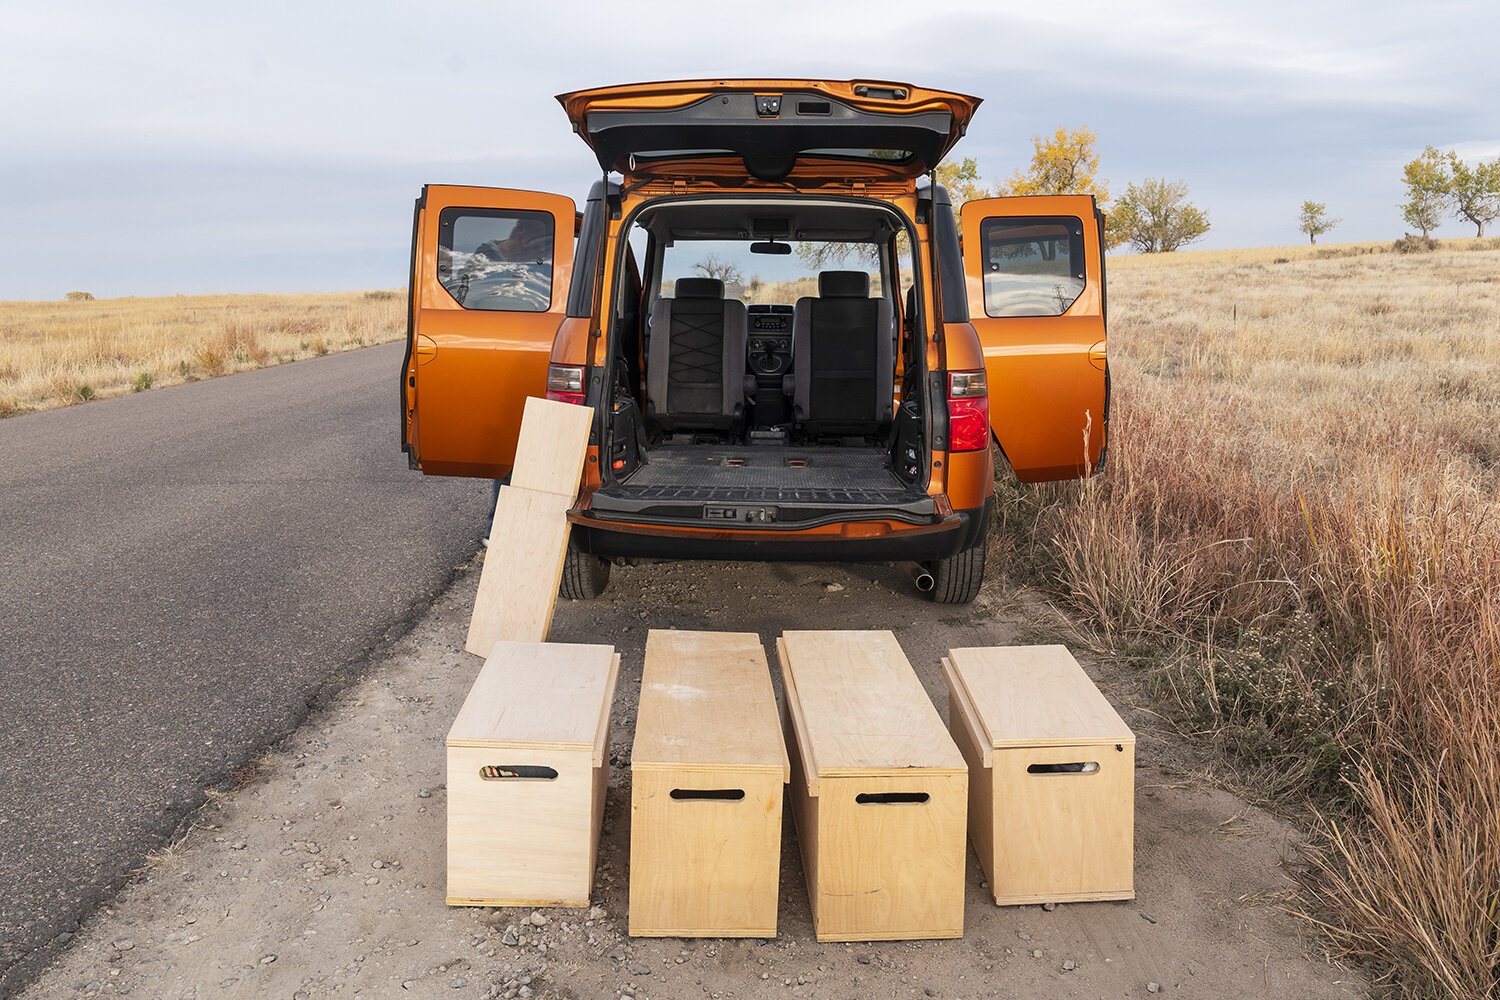
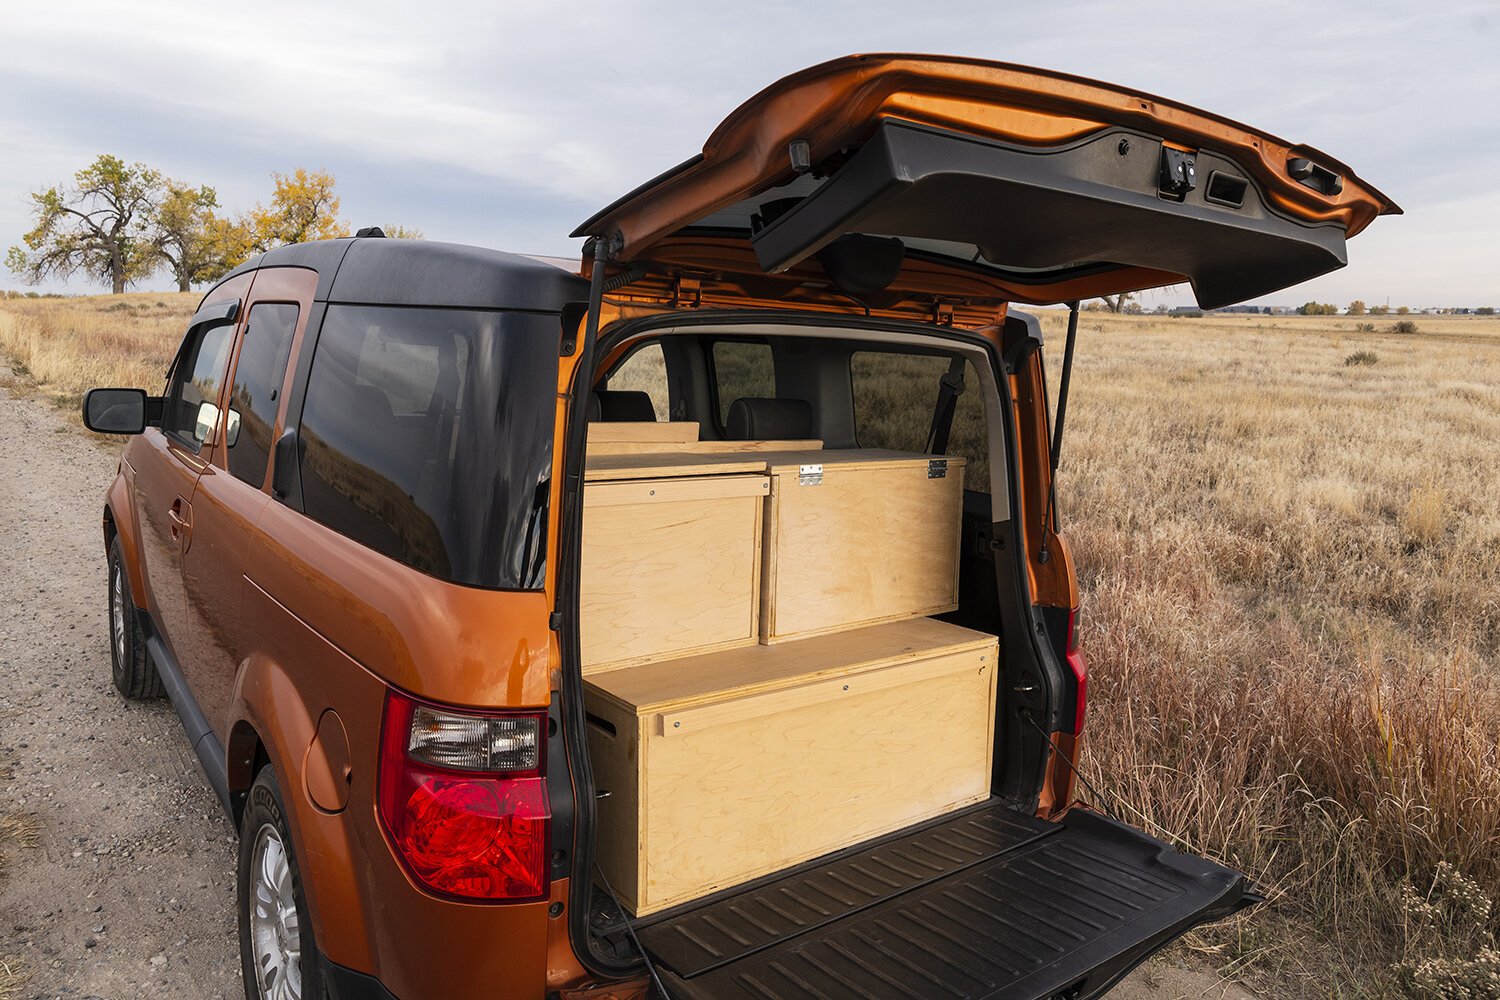
Left: The boxes and center support boards as seen removed entirely from the back. Right: All four boxes and center supports fit in the back cargo area of the Element, which is a great option if you still want to use your seats most of the time.
Honda Element Camper Conversion Step By Step
Part One: The Plans
After looking at what others had done, we decided to use plans we found from @hotelement in the community forums at www.elementownersclub.com. The cut list for the wood was essential, and I can’t stress how much that helped instead of trying to guess the dimensions myself.


Part Two: The Tools & Materials
In addition to the wood specs included in the cut list, here are the items that I purchased or used for this project.
· Ryobi 18-Volt Lithium-Ion Cordless Drill
· 1” Drill Bit + ¼” Drill Bit
· Ryobi 18-Volt Lithium-Ion Cordless Jig Saw
· 100 Pack of ½” x 2” Wooden Dowels
· 2” Utility Hinges (8 total)
· 1” Flat Head Wood Screws (100pc)
Part Three: The Assembly
If you purchase the ¾” pieces of maple plywood from a big box hardware store, then they can cut the pieces you’ll need for a small fee. I decided to go a different route as I had an acquaintance with his own workshop. Getting precise clean cuts for the box pieces is really important. Remember the old proverb, measure twice and cut once.
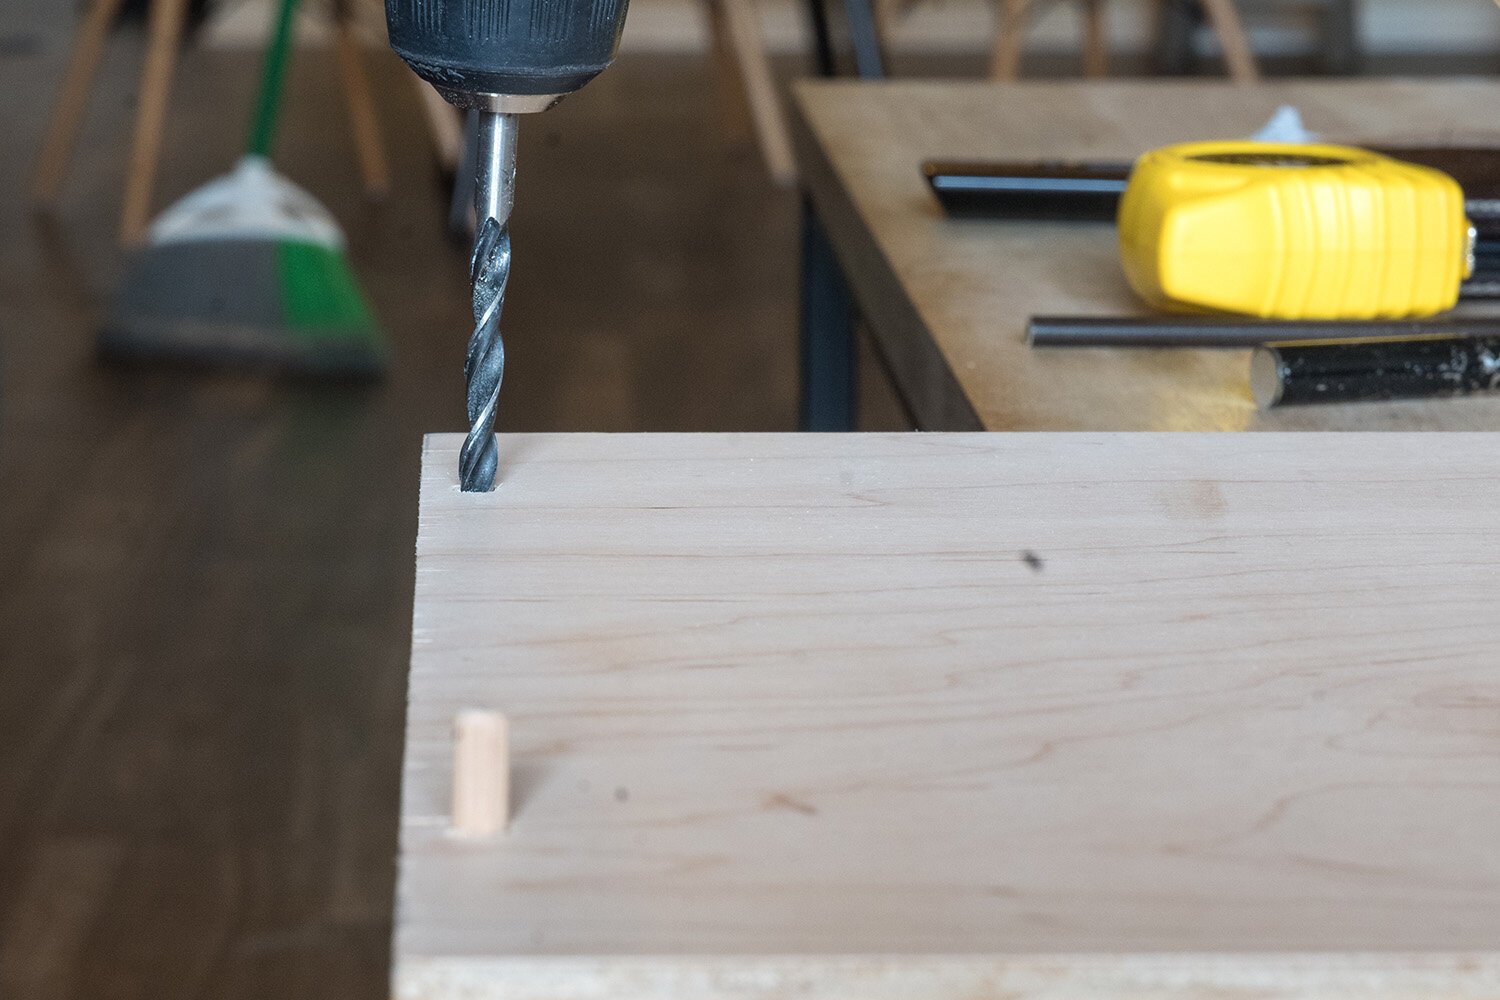
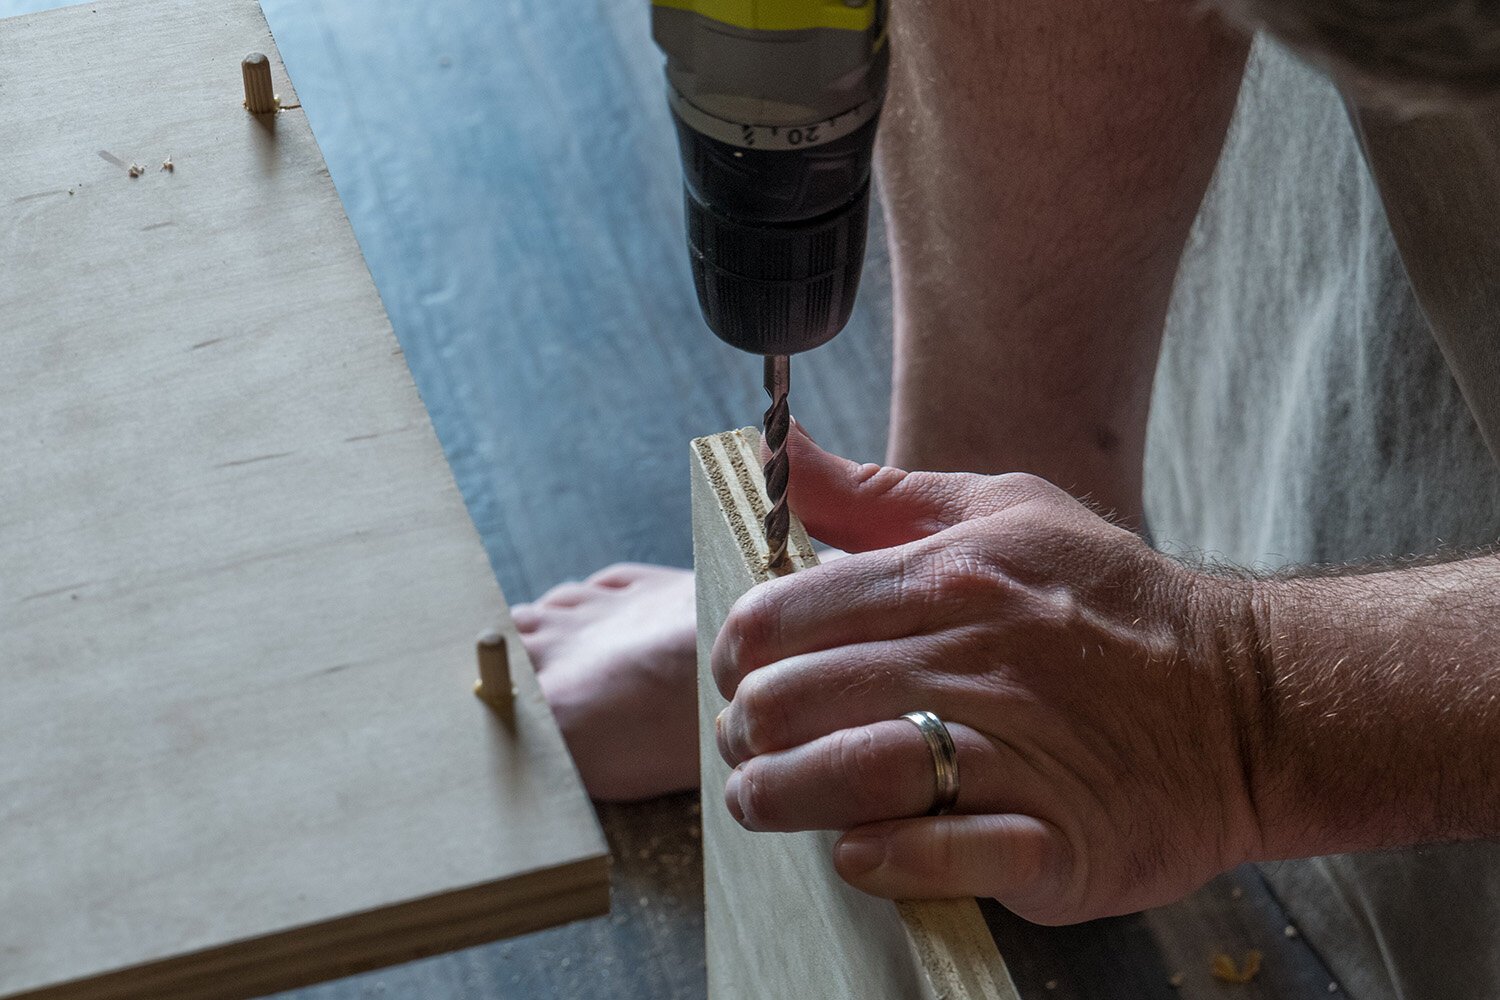
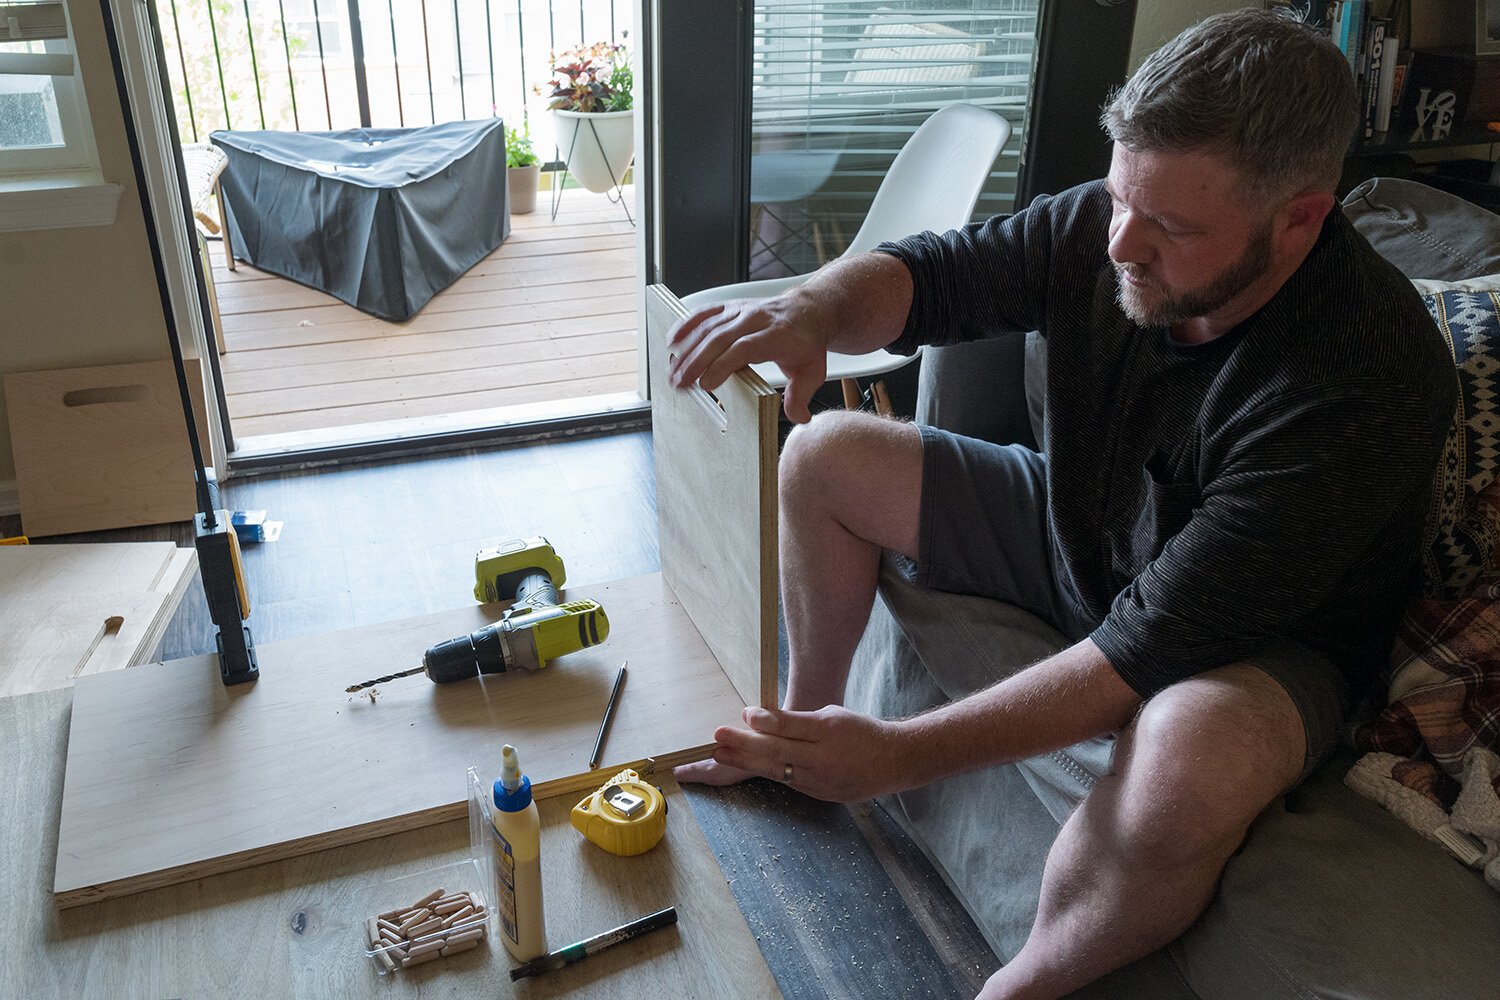
Once I had all of my pieces cut, I began pre-drilling holes for the wooden dowels which would help hold the box pieces together.
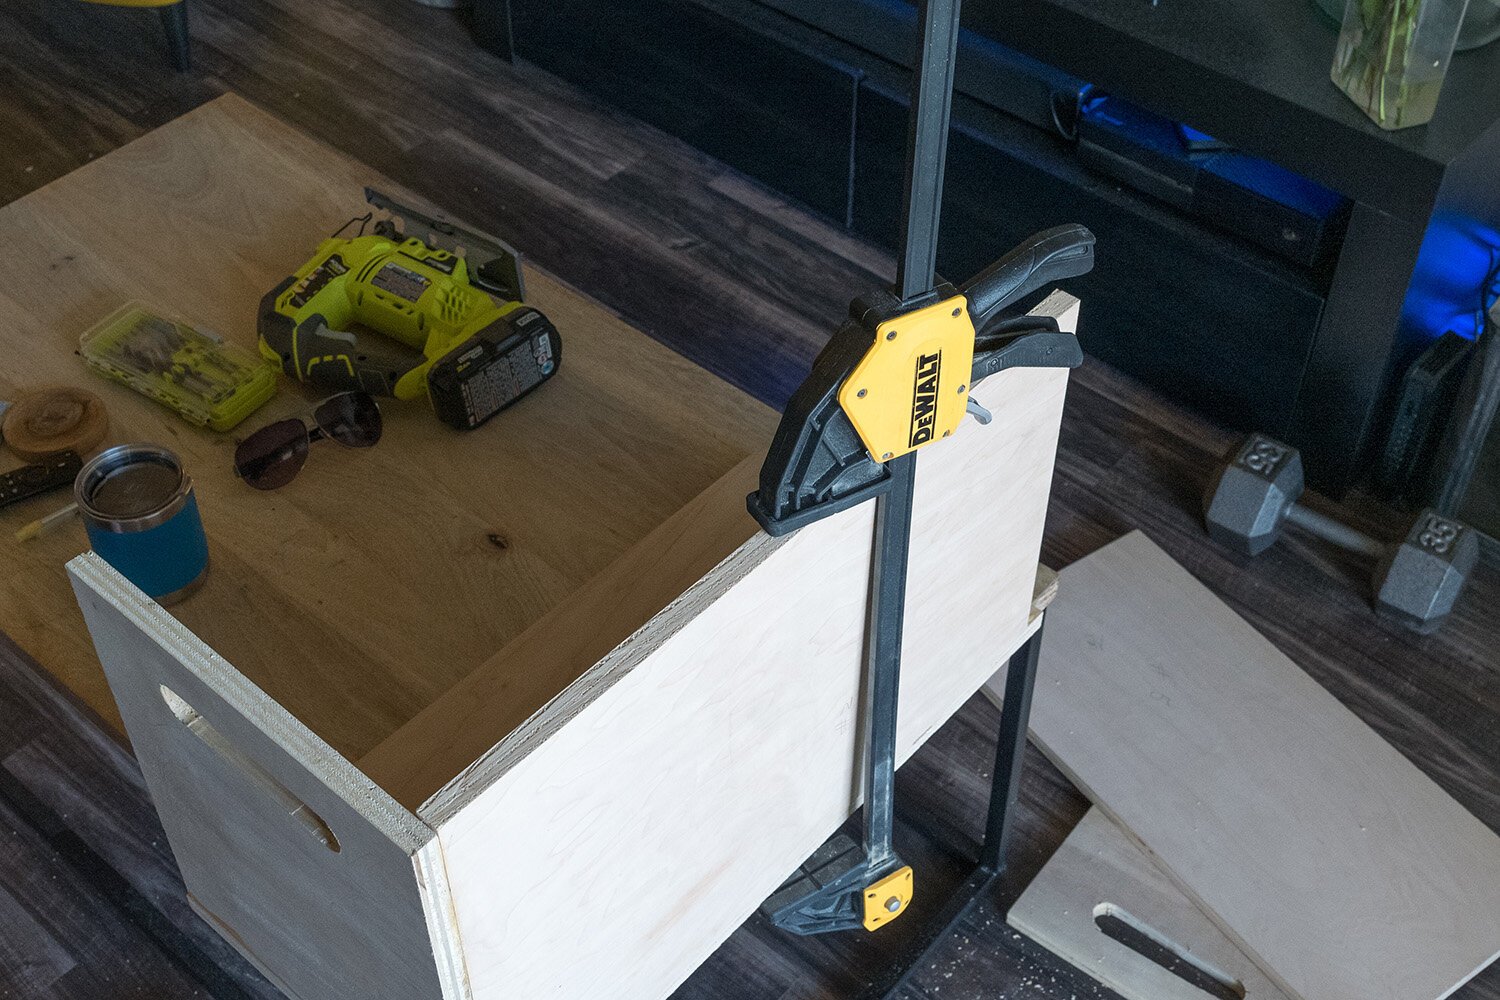
Note: if I were to go back and do this project over again, I would have definitely used biscuits instead of dowels. Since I didn’t really have any carpentry experience to speak of, I wasn’t familiar with biscuits or how they worked. Basically, they serve the same function as dowels, but you don’t have to be as precise and allow for a greater margin of error. I quickly realized how difficult it can be to drill the holes for your dowels and have them line up correctly. That’s where the Handheld Dowel Jig Kit comes in. This simple tool helps make sure that the holes you drill for your dowels lineup correctly between two different pieces of wood. Whichever option you choose, you really want to take your time on this step in order to make sure the various pieces of wood will fit together correctly.
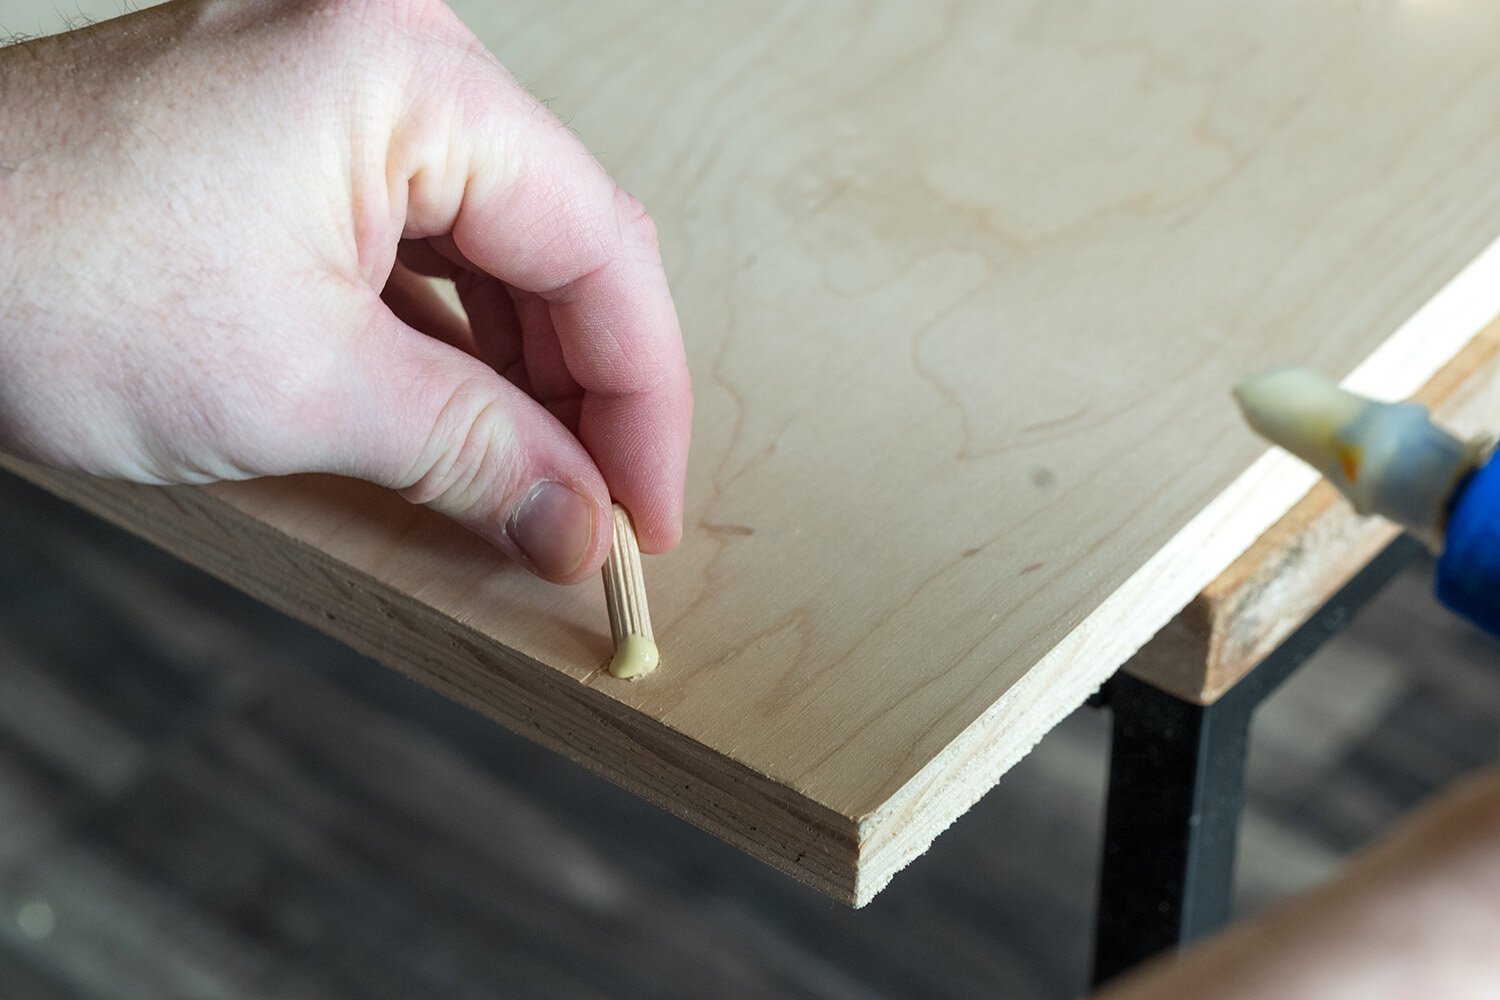
You also want to think about the order in which you assemble your pieces. I found the best approach was to start by attaching the longer side pieces to the bottom piece of your box. I placed a small amount of wood glue into each of the predrilled holes and a bead of glue along the edge where the two pieces would attach. Once the dowels are inserted into the side pieces, carefully place them into corresponding holes drilled into the bottom piece. Assuming everything is flush and looks good, use your clamp(s) to secure the pieces together as the wood glue dries. Wipe away any excess glue and wait at least 30 minutes for the wood glue to do its thing.
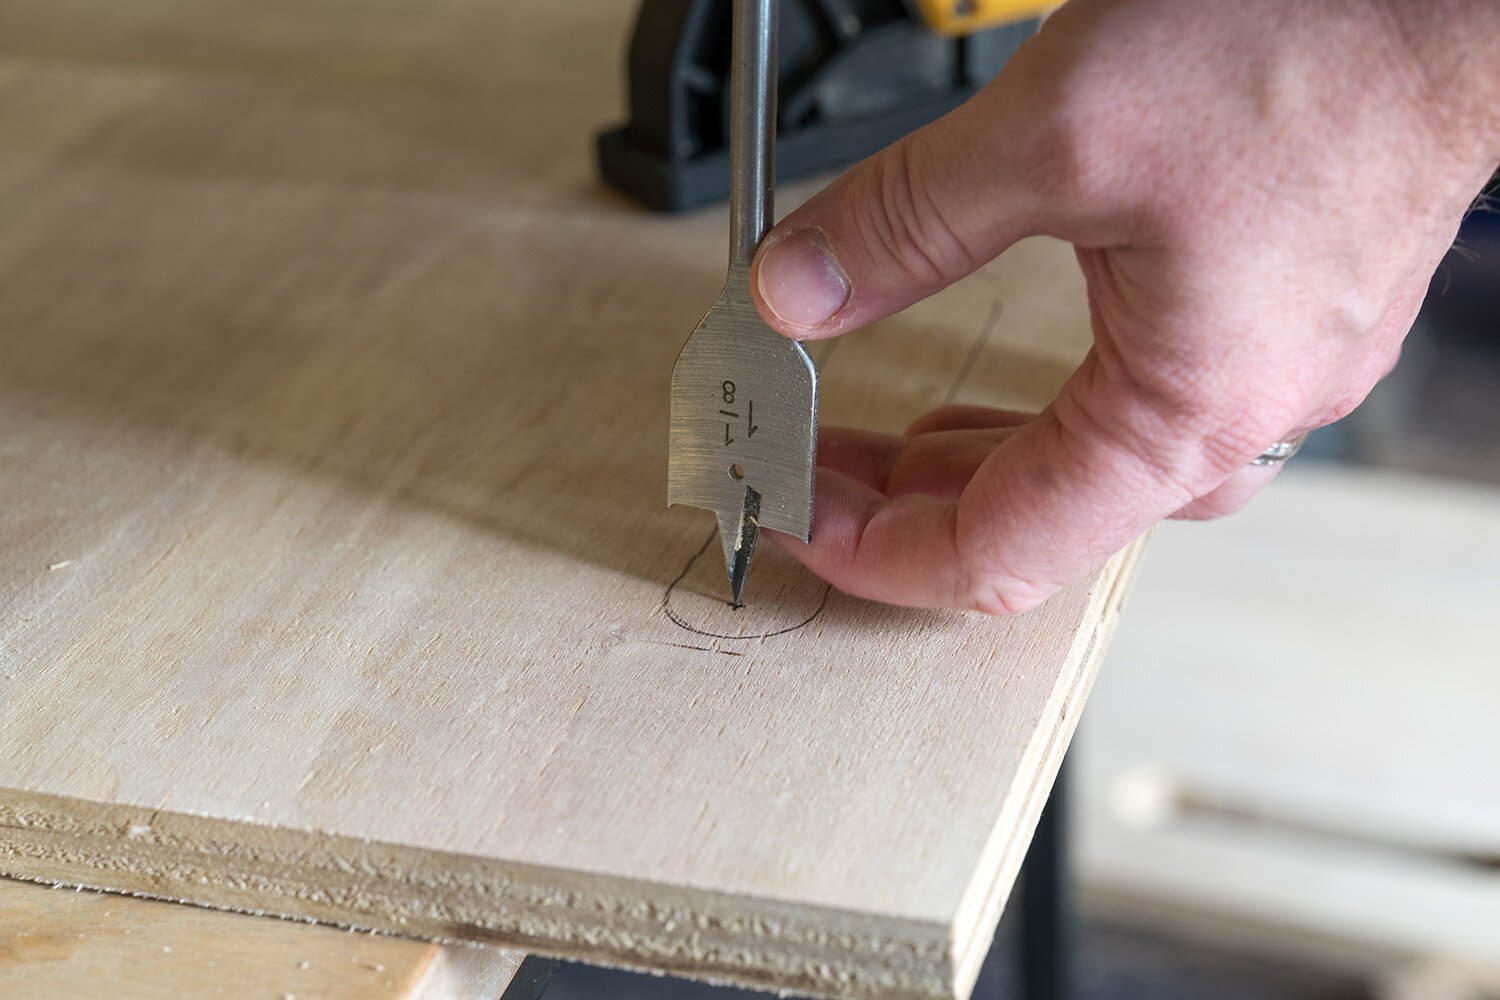
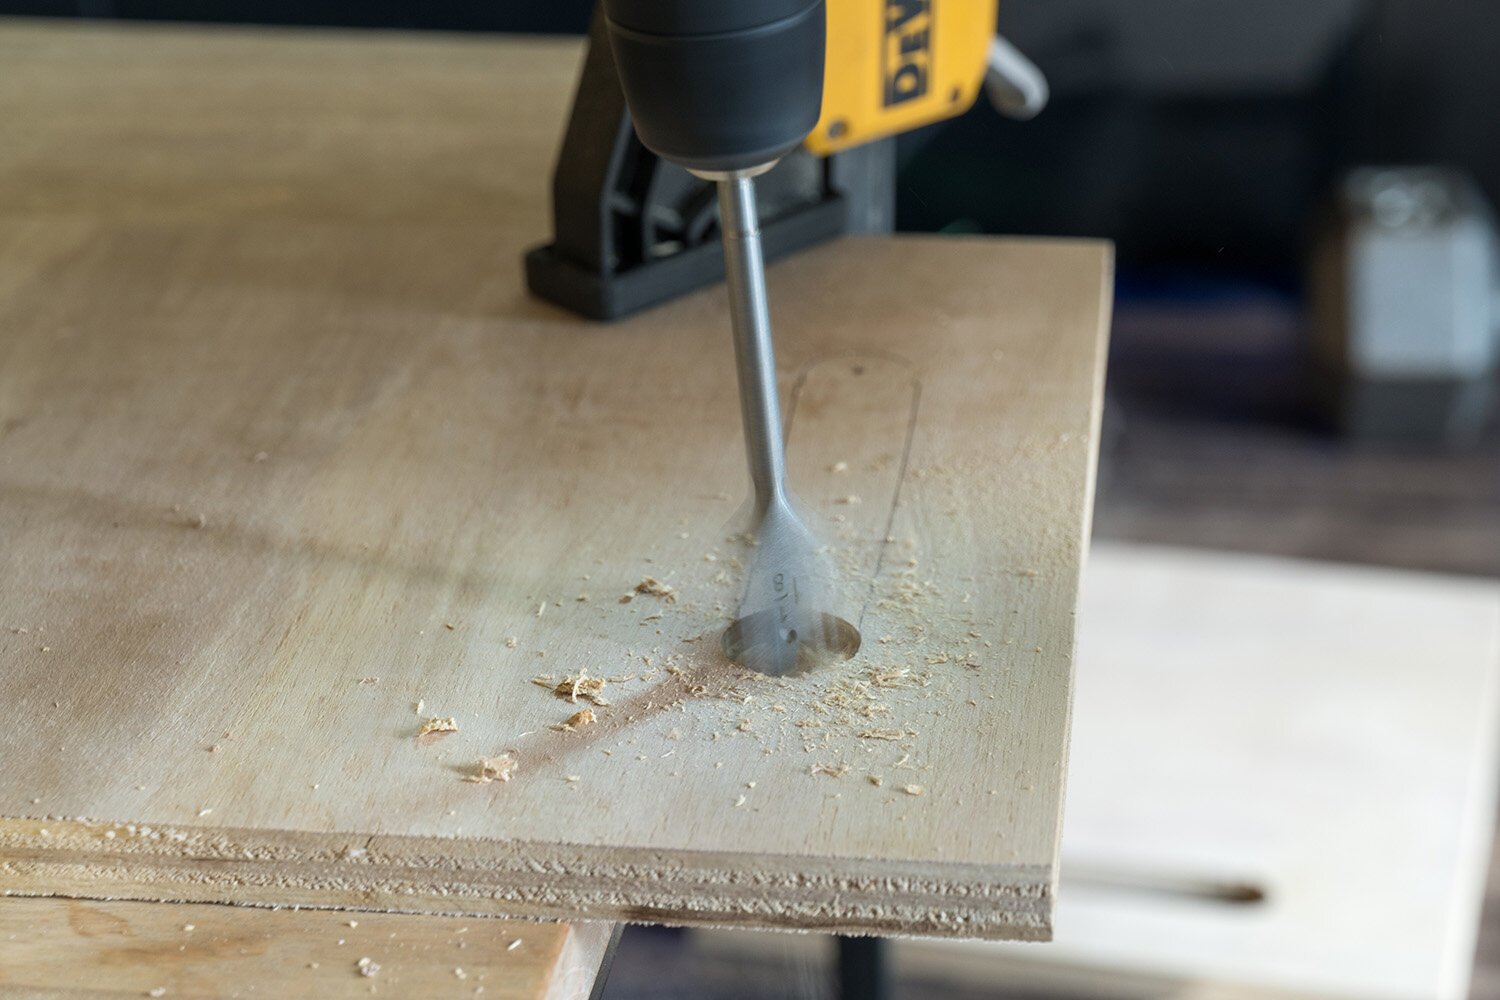
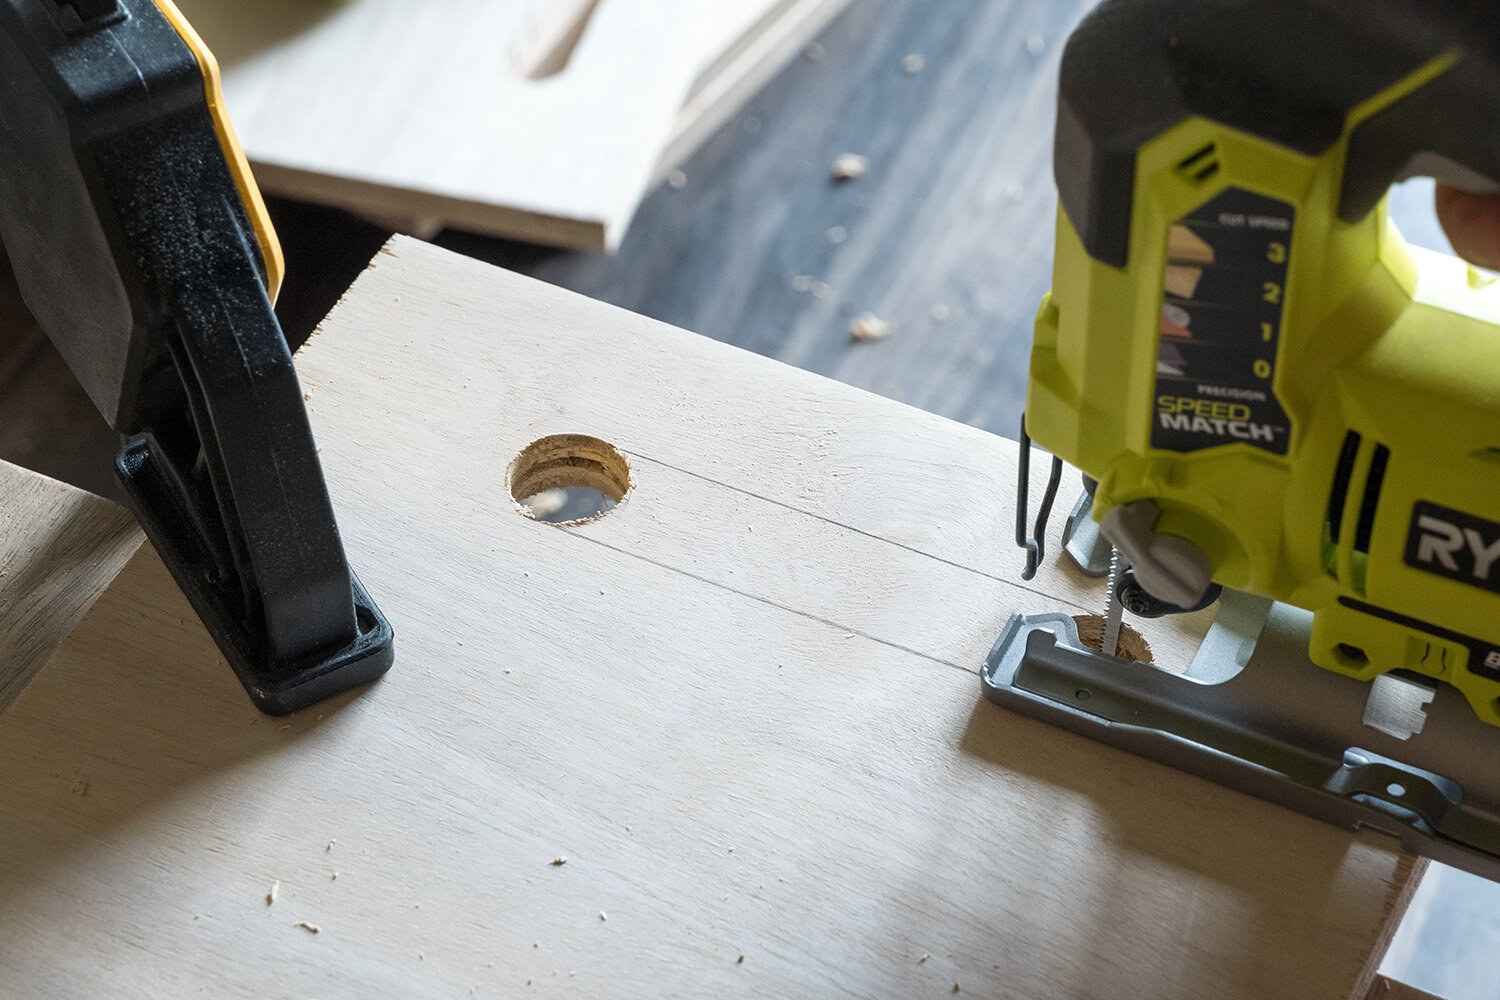
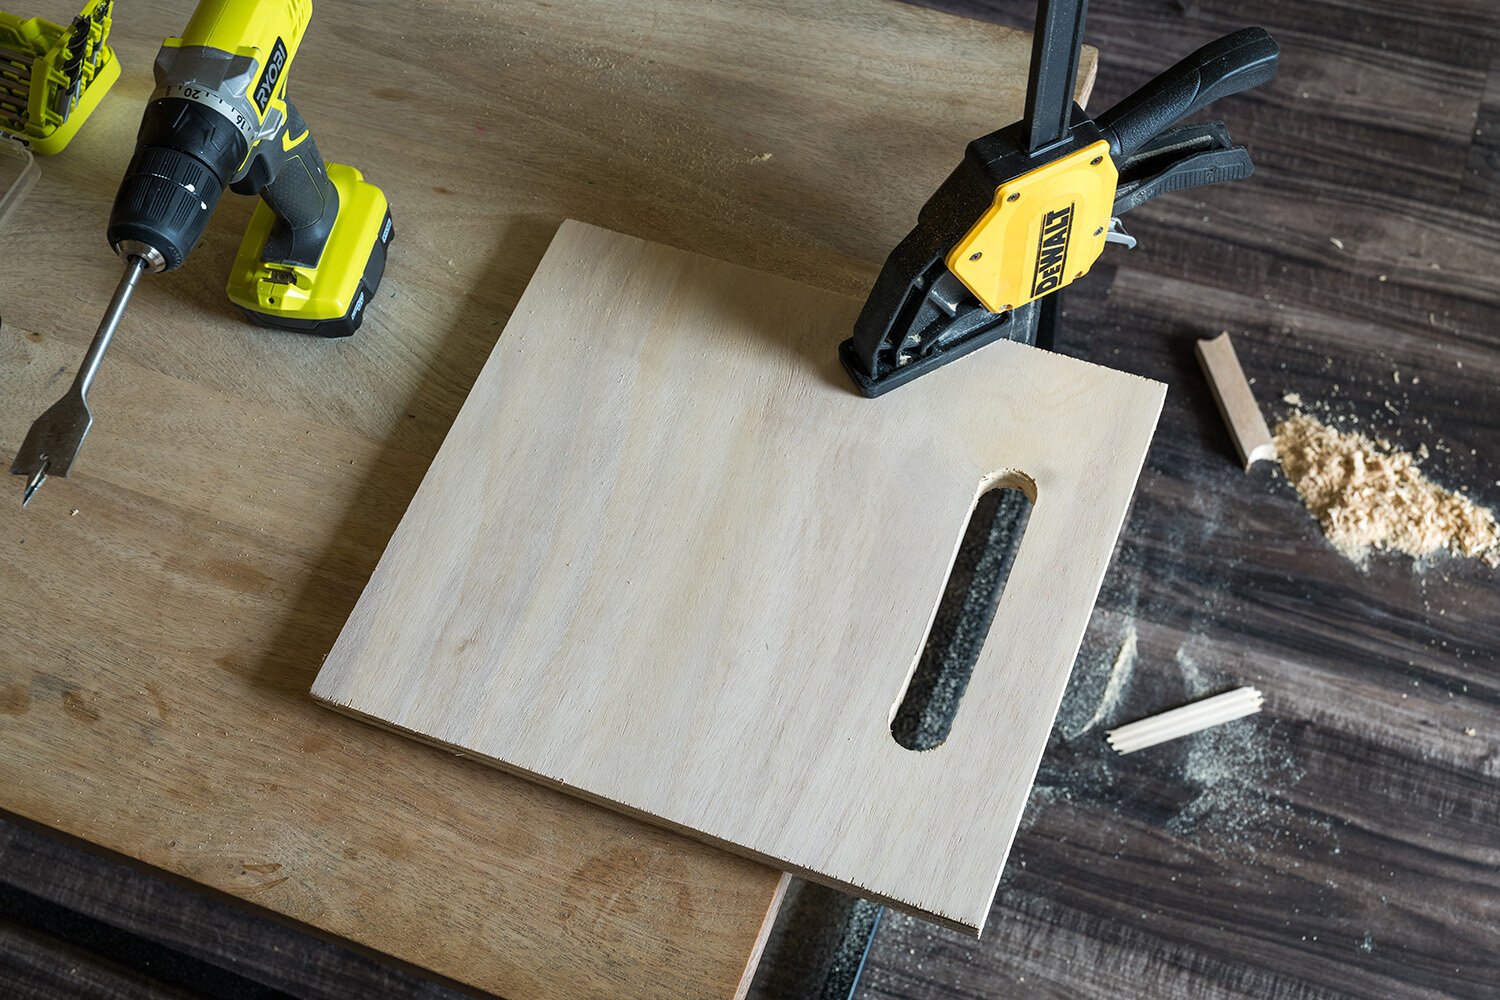
The next step was to attach the end pieces, but first I wanted to add some cutout handles. I used a 1” drill bit to cut out two circular holes that were about 6-8” apart. I then used a jig saw to cut straight(ish) lines between the two circular holes. This created the cutout handles that would allow me to easily grip and carry the boxes once they were assembled.
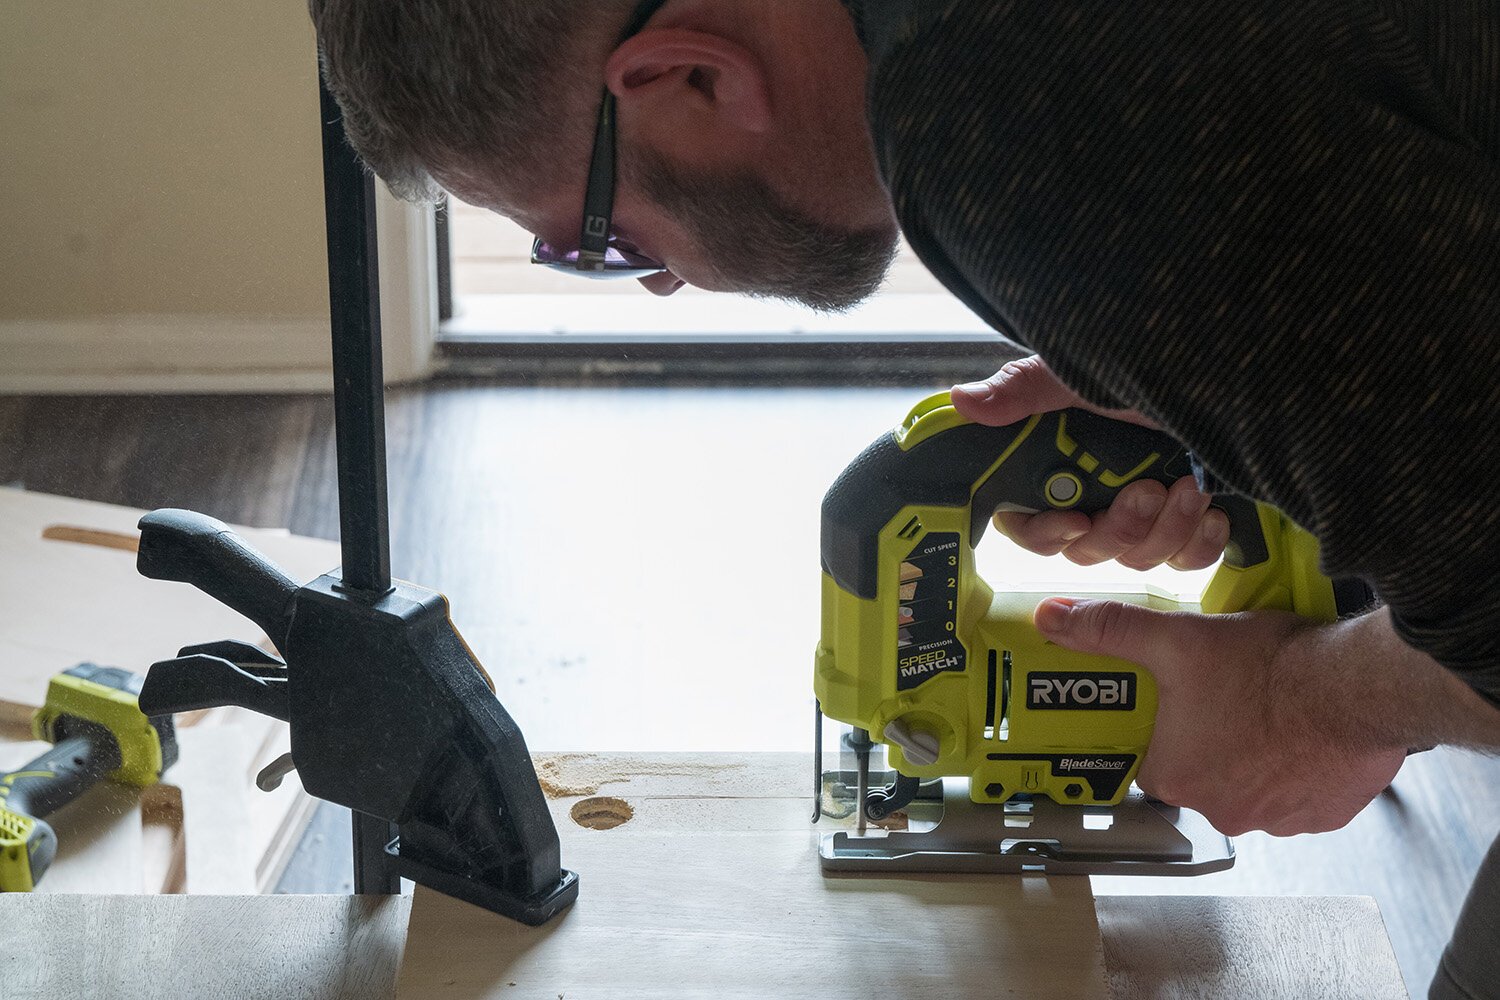

Now that my end pieces had handles, I glued and inserted dowels to be attached to both the bottom piece and the already attached side pieces. You will want to run another bead of glue along the seams of the sides and bottom piece and then carefully attach your end pieces. This can be a little tricky when using dowels and may require you to “muscle” them into place. Once you have the end pieces aligned and attached with the dowels, use your clamp(s) again to create a secure bond.
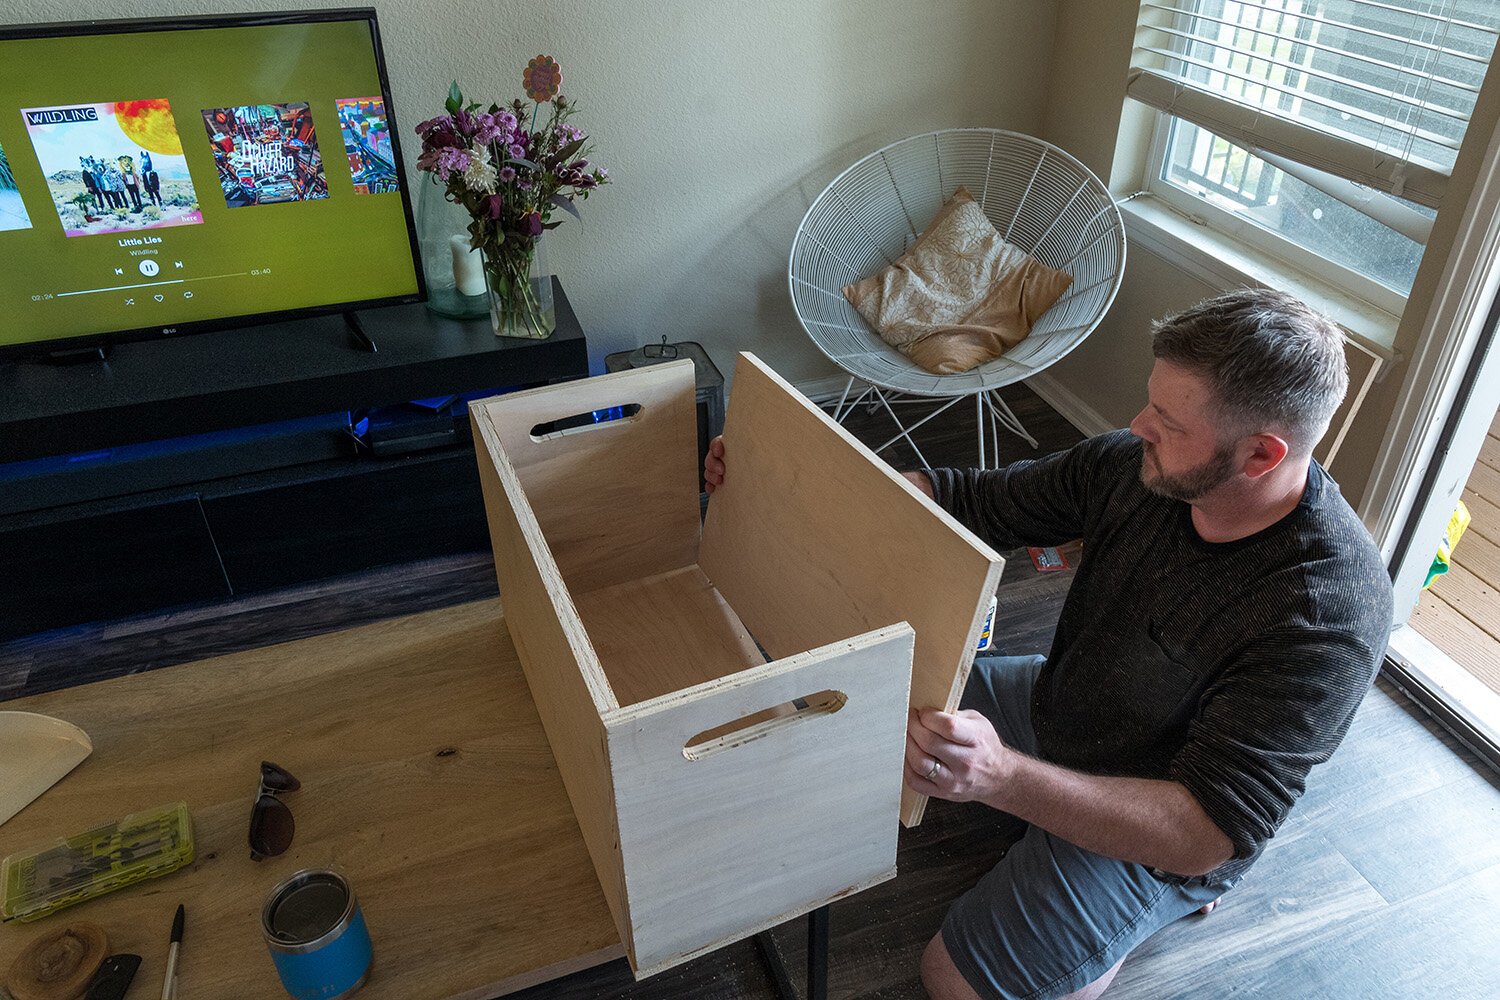
The only thing left is to attach the top piece of the box using the utility hinges.
Note: the first set of hinges I purchased were the ones (I thought) from hotelement’s project. They were a little too big, and I couldn’t get them to work correctly, so I ended up going with a more basic utility hinge. These seem to work just fine, but there may be some benefit to researching your options here. I would also recommend pre-drilling the screw holes for your hinges because you want them to be properly aligned. If you just start to drill the screws in without predrilled holes, it can be easy for them to get out of alignment. Repeat these steps until all four boxes are complete.
There is still one more step before you can use it as a platform bed. You will need to attach a support rail to each box that will allow you to place the extra two pieces of wood between them. I ended up purchasing an additional ½” piece of maple trim that I then cut the length of each box. I used three 1” flat head wood screws to attach the trim piece to each box (opposite of the hinged side). With the support rails in place, you can now arrange your boxes and place the two extra pieces of wood between them to complete your platform bed.
Part Four: The Finished Product
Another unexpected challenge popped up once I tried to assemble the platform bed in the back of the Element. Once we removed the rear seats, I realized there were notches on each side of the Element that prevented the boxes from fitting! This was a major disappointment, and I was surprised that I hadn’t come across anyone mentioning this before. I ended up cutting the middle support (the piece between the two longer boxes) and removing about 1-2” from its width. So now instead of our platform bed being a squared rectangle, it has a slight “T” shape. It’s not the end of the world, but it’s definitely something to consider if you’re attempting this project yourself.
Considering my lack of woodworking experience, I’m fairly happy with the way things turned out. We organized all of our camping and hiking gear into each box and found that we still had a little room to spare. We also decided to purchase a thin futon mattress that still fits in the available space below and makes our sleeping situation a lot comfier.
Among our favorite car camping essentials is a Goal Zero Yeti 400 Lithium Power Station. Think of it as a portable generator that doesn’t require gas. This little beast allows me to use my CPAP machine throughout the night (which my wife appreciates) and quickly recharges all of our electronic devices while we’re out exploring the wilderness. Plus, you can even recharge it while you drive by using the 12V Car Charging Cable (sold separately).

Honda Element Accessories

Honda Element Decal
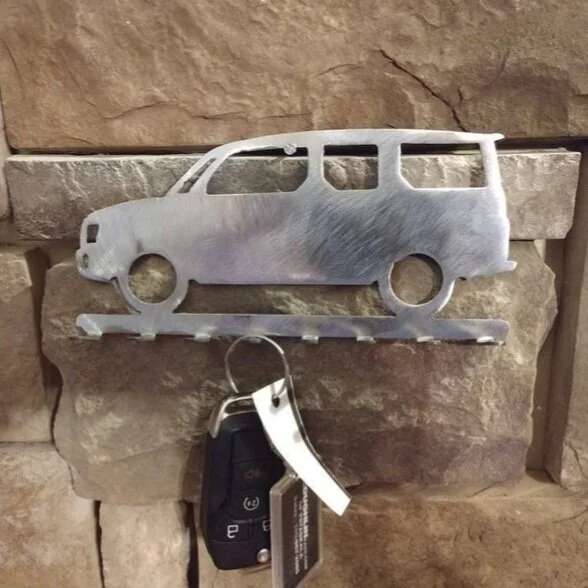
Honda Element Metal Hanging Key Holder

Element Gen2 Patch

Honda Element Toaster Vinyl Sticker

Summertime Honda Element Palm Trees Sticker

In My Element T-Shirt

Honda Element Periodic Table T-Shirt

Honda Element Adventure is Calling Mug

Proud Toaster Honda Element Coffee Mug

Want More Honda Element camper Inspiration?

Check out The Wayward Home’s article: Honda Element Camper: Why this Rig Has a Cult Following? for more Honda Element awesomeness.
The Wayward Home is a travel website by Kristin Hanes, a former radio news reporter, sharing tips for maximizing simplicity and tiny living.